This is the documentation for the Hairdini SUBSTANCE DESIGNER MATERIAL.
For the Hairdini Houdini HDA Documentation, please click HERE.
For the Hairdini Unreal Engine Shader Setup Guide, please click HERE.
The Substance Designer Hairdini Material is included with the Hairdini HDA Tool, available at Gumroad.
Below is the documentation with an explanation for each parameter. Feel free to email with any questions or suggestions for further development.
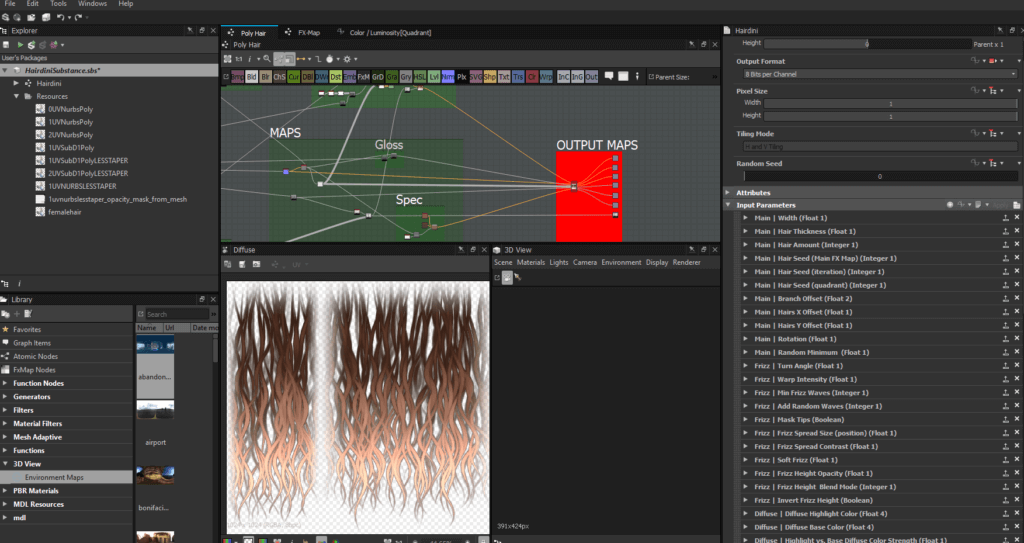
The Hairdini Substance has seven sections: MAIN, FRIZZ, DIFFUSE, SPECULAR GLOSS, MAPS, EDGE MASKING, and SECTION MASKS. Below is an explanation for each parameter.
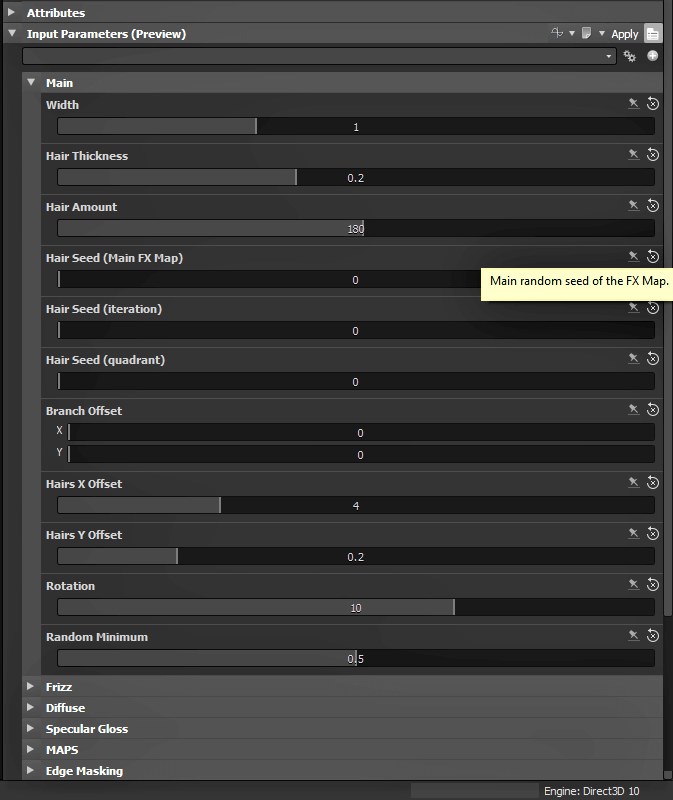
MAIN TAB
Width: Width controls the UVx stretching. Lower the value to condense the width, raise the value to stretch the width. PLEASE NOTE: The Hairdini Substance uses an edge mask to feather the edges of your hair cards. If you use the tiling options in Unreal Engine, Marmoset, etc, the edge feather mask will also tile. NOT GOOD. So only use the substance’s BUILT IN Width option to control X tiling as it adjusts the stretching BEFORE the edge feather mask is applied within the substance graph.
Hair Thickness, Hair Amount, and Hair Seed: These are fairly self explanatory. They control your hair thickness, how many hairs, and random seeds. The FX Map controlling the hair pattern in the substance graph has three random seeds: One in the main node, one in the iteration node, and one in the quadrant node. So you have three random seeds to mix and match.
Branch Offset, Hairs X Offset, Hairs Y Offset, and Rotation: These are also fairly self explanatory. Branch Offset controls the offset values for the main pattern, which I suggest leaving alone, especially the Y value as it will crop your pattern if pushed too far. Hairs X Offset randomly offsets each hair along the X axis and usually this value should be above one, or else the hairs will bunch in the center. Hairs Y Offset should be kept minimal. It will offset your hairs up and down so they don’t look uniform. Rotation randomly rotates each hair by the set number of degrees as a clamp.
Random Minimum: This value generates a random number from 0-1 and the slider adjusts the minimum clamp. It’s used in the Rotation parameter as well as in the FX Map. The lower this value is the more random your pattern. The higher it is, the more uniform it is.
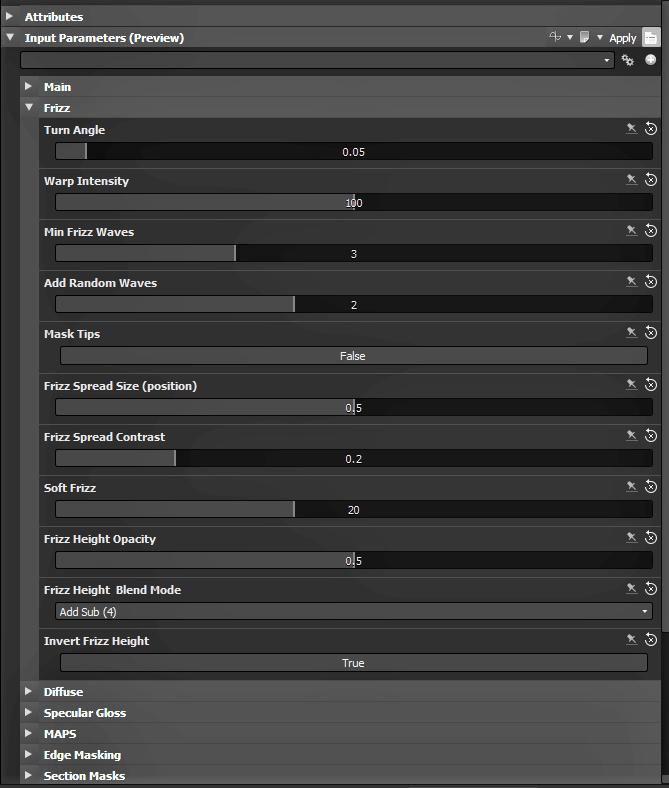
FRIZZ TAB
This section adds slight frizz and waves to the hair so it doesn’t appear procedural. It also will add a sense of depth. The parameters are below.
Turn Angle and Warp Intensity: Controls the direction and intensity of the hair warp effect to make waves and frizz patterns. Generally, be conservative. Too much intensity may have your hairs go out of the card’s bounds. However, there is a built in edge feather mask so it’s not a big concern if hairs go outside the card. For big curls and waves, I suggest doing that within Houdini and shaping the actual cards. The frizz controls are mainly to add more depth and nuance to the hair pattern so it doesn’t look like procedural lines.
Min Frizz Waves and Add Random Waves: These control how many waves per hair you have and how many additional waves are added at random. Each wave added will soften your warp intensity.
Mask Tips, Frizz Spread Size, Frizz Spread Contrast, and Soft Frizz: These control the frizz mask that controls where frizz appears. Mask Tips, when set to false, will let frizz gradually increase moving down from root to tip. When set to true, the tips are masked and frizz warping appears at the center of the card. Spread Size controls the position of the frizz moving up and down the hair and Spread Contrast controls the fall off. Soft Frizz softens the frizz pattern via a blur node, if you find the waves are too sharp.
Frizz Height Opacity, Height Blend Mode, and Invert Frizz Height: The wave pattern used to warp the hair is composited on top of the hairs to darken and lighten the hairs height map. This creates a sense of depth with each frizz curl and really adds a sense of volume and life to the hair. Height Opacity controls how strong this effect is. Height Blend Mode determines how the warp pattern is composited over each hair’s height. You can choose from Copy, Add Sub, Overlay, and Screen.
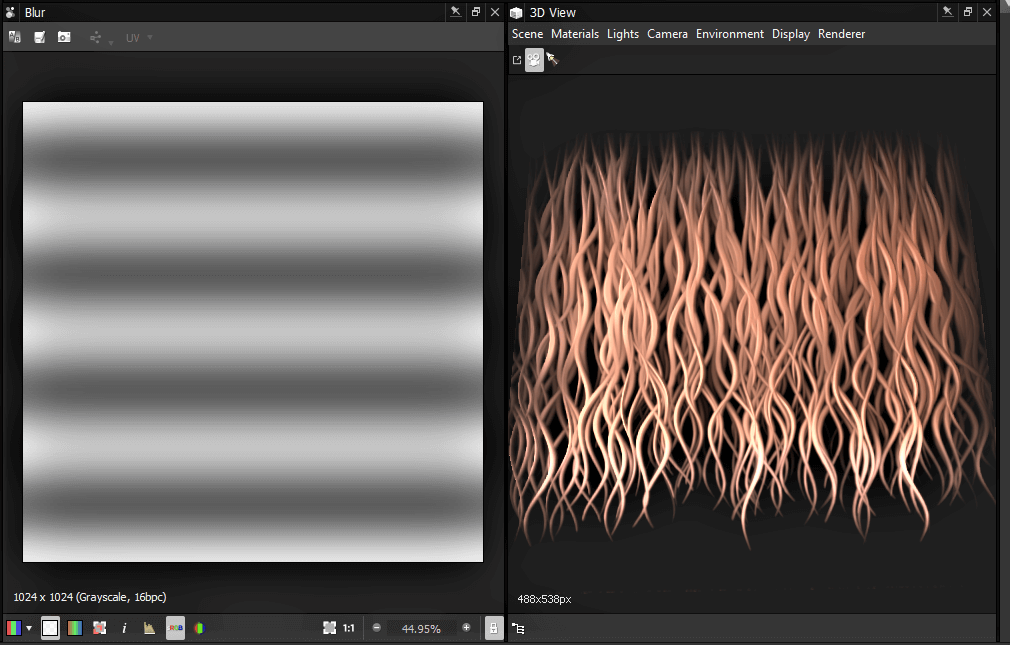
The frizz warp pattern, which we’ll use to overlay the height map to add depth to each curl.
Frizz Height Opacity set at a decent value. This is to give depth to your frizz waves. The same pattern used for warping the curls also adds / subtracts from the height map.
Invert Frizz Height reverses the overlay pattern so what’s “high” on the height map becomes low and vice versa. While it may sound trivial to invert the frizz height map, it will have a noticeable effect on the tips. The tips of each hair are generally on a higher height by default, when Invert Frizz Height is set to FALSE. Set Invert Frizz Height to TRUE to have the tips become lower in depth value on the height map.
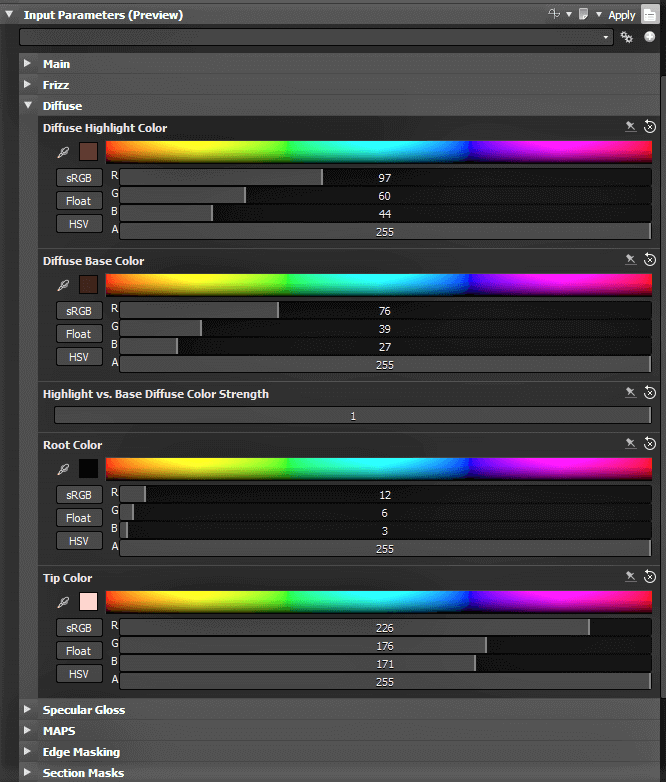
DIFFUSE TAB
Fairly self explanatory, the diffuse settings feature a Highlight Color and Base Color. The Highlight color is laid over the Base Color towards the center of the hair card and center of the hair strands to provide a sense of depth and curvature to the hair. Adjust how strong the Highlight Color is by using the Highlight vs. Base Color Strength parameter.
Root Color and Tip Color allows you to change the color of the roots and tips of the hair strands, so you’ll usually pick a darker version of the Base Color for the roots, and a lighter version for the tips…or whatever you want. You can set the position of the roots and tips down below in the section called “Section Masks“.
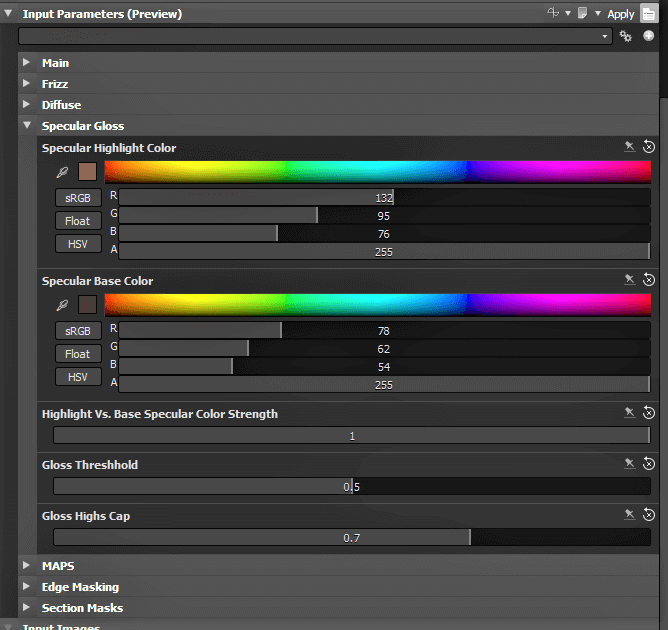
SPECULAR GLOSS TAB
This controls the Specular Color and Gloss Maps. Very similar to the Diffuse Color settings, these are also self explanatory. There’s a Specular Highlight Color that’s laid over a Specular Base Color via a curvature like pattern, with the Highlight Color concentrated in the center of the card and the center convex portion of each hair strand. Control the strength of the Highlight Color via the Highlight vs. Base Specular Color Strength parameter.
Gloss Threshold and Gloss Highs Cap control the amount of gloss. Gloss Threshold controls the midpoint of the gloss map’s curve. Setting it to lower values exposes more of the hairs to be glossier, setting it higher chokes the highlights to be more rough. The Gloss Highs Cap setting allows you to clamp the gloss values, so they won’t go over the set amount.
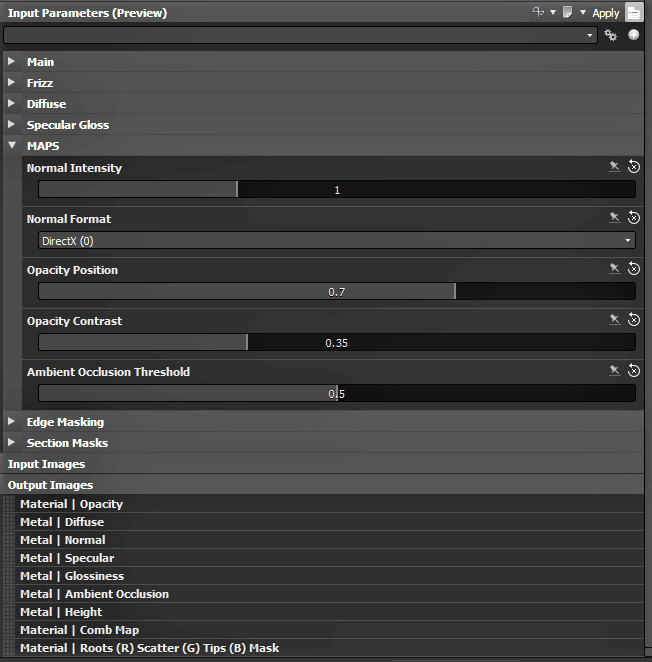
MAPS TAB
The rest of the main output textures are in this section. Normal Intensity controls the normal strength and Normal Format allows you to choose between DirectX vs. OpenGL.
The Opacity Position and Opacity Contrast parameters will have a MAJOR impact on the look of your hair. The Opacity Position determines the strength of the opacity mask. Higher values reveal more hair but can make the hair cards look flatter. Lower values fade out background hairs and give a much better sense of depth and variation to the hair, but can thin the hairs too much if set too low. Opacity Contrast controls the contrast of the Opacity Mask. Set it high to get crisper edges and eliminate stray hairs. Set it lower to get a much more even falloff, but possibly risk getting a dirtier mask, if set too low.
Ambient Occlusion Threshold controls the strength of the ambient occlusion. Set the values higher to get stronger AO, lower to get more subtle AO.
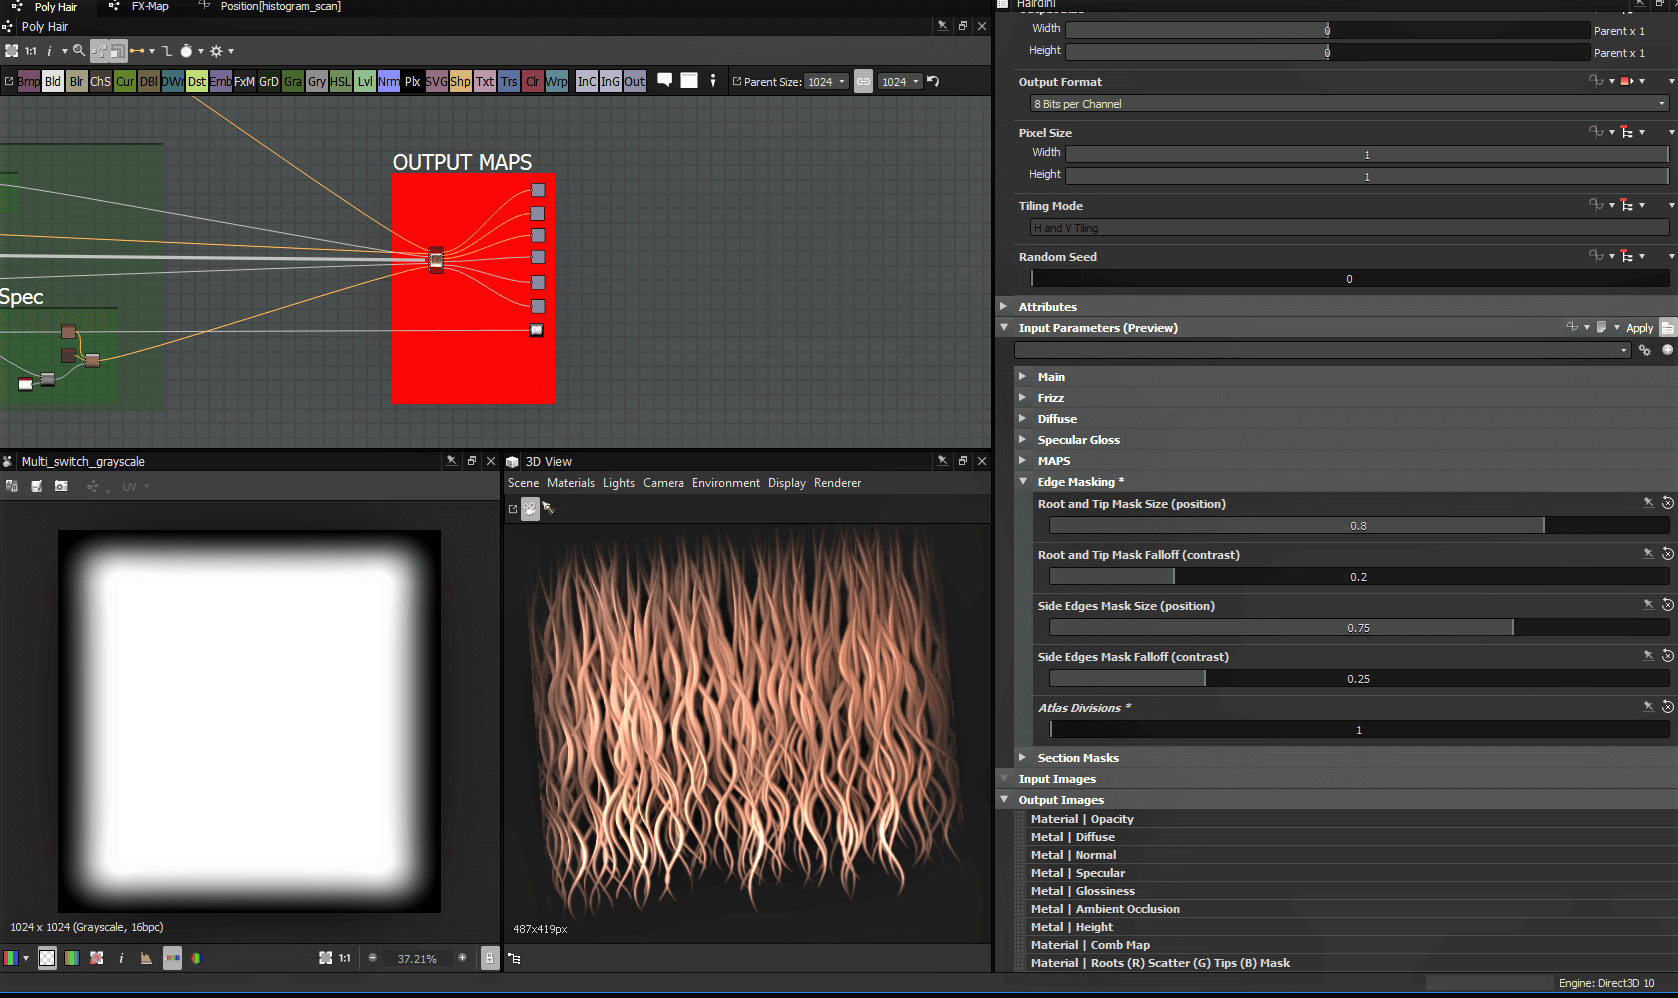
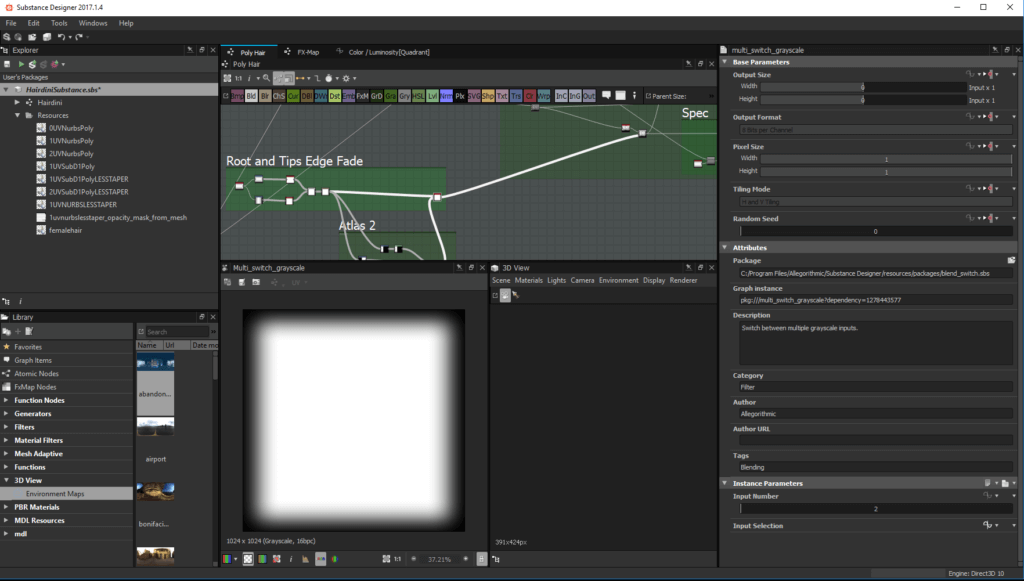
EDGE MASKING TAB
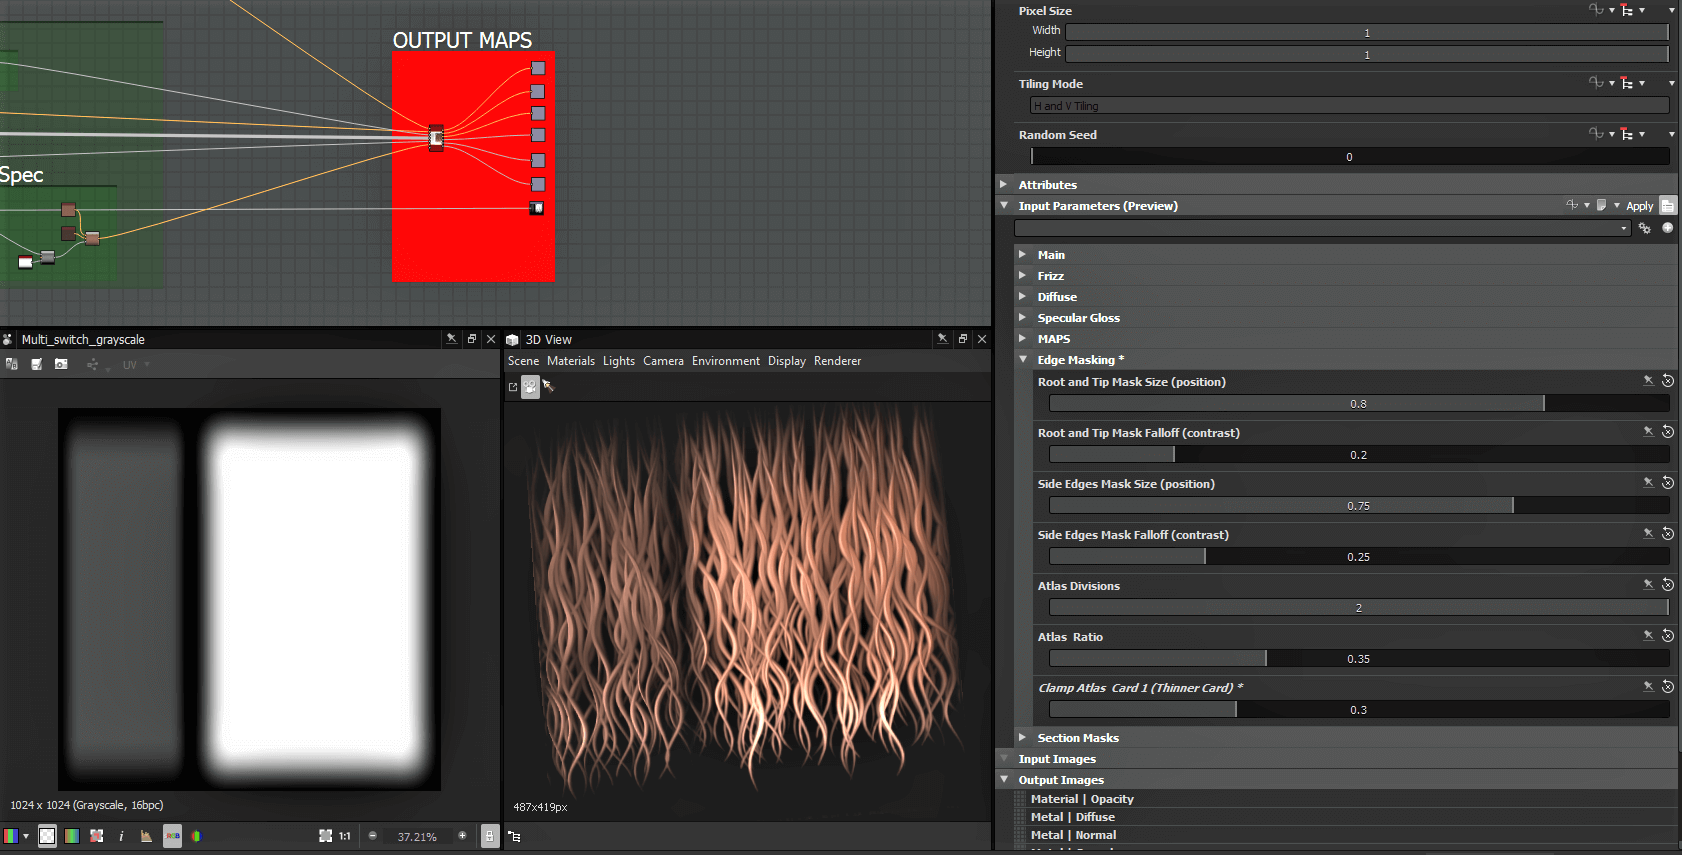
Edge Masking tab of the Hairdini Substance Designer Material. Note: If Atlas Divisions is set to 1, two parameters will NOT be visible. Set Atlas Divisions to 2 if you’ve made a texture atlas with Hairdini Helper. This will then reveal the Atlas Ratio and Clamp Atlas Card 1 parameters.
These control the masks that fade the edges of the hair cards. This helps the cards not appear to be polygons. There’s two separate masks that are combined: a Roots and Tips Mask that controls the top and bottom of the card and a Side Edges Mask that fades out the sides of the card. Mask Size controls the position of each mask: the higher the value, the more hair that is revealed. The lower the value is, the more hair that is masked. The Mask Falloff controls how gradual or harsh the mask edges are. Higher values are more sharp and contrasty. Lower values are more gradual.
Atlas Divisions, Atlas Ratio, and Clamp Atlas Card 1: Atlas Divisions determines if the texture atlas is active. Set it to 1 and the texture atlas is off: Edge Masking is normal, at the edges of the UV space. Set it to 2 and there’s a divider line to divide the UV into sections fitting two sets of hair cards: Thinner cards on the left, wider cards on the right. This divider line inherits the Edge Mask despite not being in full 0-1 UVx space. This REVEALS 2 EXTRA PARAMETERS: Atlas Ratio and Clamp Atlas Card 1. They will be INVISIBLE if Atlas Divisions is set to 1.
Edge Mask at the default 0-1 UV space without a texture atlas setting.
Substance Designer texture atlas set with a .35 ratio to match the .35 Hairdini Helper atlas ratio setting. This masks each partition of the texture atlas for feathered edges.
Substance Designer texture atlas sample, set at a ratio of .35 to match the .35 set in Hairdini Helper’s texture atlas option. Notice the division edge mask. You can adjust the edge masking in the Hairdini Substance and still get edge masking for the divider line, thanks to the texture atlas options in the Hairdini HDA and the Substance Material.
Set the Atlas Ratio parameter to where you want this divider line to go, based off your Hairdini Helper settings from Houdini. For instance, let’s say you have made a Hairdini hair card group for a character’s beard and it has thinner cards than the scalp hair. Using the Hairdini Helper node in Houdini, let’s say you set the Atlas Ratio value for the Hairdini Helper node to .3. The beard cards, on the left, would be 0-.3 UVx space. The rest of the hair cards on the scalp would be in .3 to 1.0 UVx space. You would set the Atlas Ratio to .3 to match the same parameter from Houdini. The divider will mask the right edge of your beard cards and left edge of your scalp cards.
Clamp Atlas Card 1 darkens the first atlas section on the left (the one keeping the smaller cards). This is there to help blend in smaller scraggly hairs, so they don’t have the same thickness of scalp hair. Setting this to a lower, darker value will help thin those hairs out a tiny bit in relation to the main scalp hair. See the picture below. This will help sell the illusion of stray hairs as those you’ll most likely texture atlas to the smaller, left side partition.
Clamp Atlas Card 1 DARKENS the thin hair cards partition on the left side of the texture atlas. This helps minimize smaller hairs as you’ll most likely use the small atlas for stray hairs etc. You can then choke these hairs more using the Opacity Mask settings.
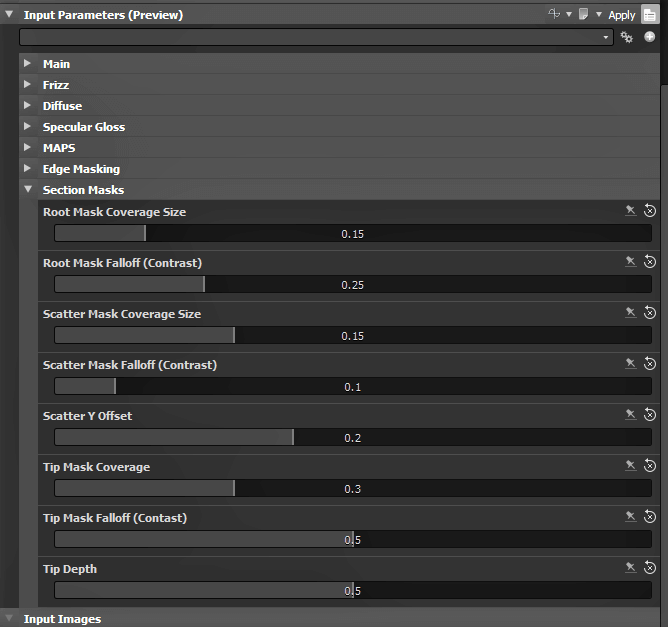
SECTION MASKS TAB
These are various masks covering sections of the hair: Root, Scatter (middle portion towards the roots), and Tips. The Mask Coverage Size determines the position of the mask and makes it bigger or smaller. Increasing the Root Mask Coverage size will increase how much root color there is, for instance. If you think the Tip Color is too high up, decrease the Tip Mask Coverage Size, etc. Mask Falloffs, again, determine how sudden (high value) or gradual (low value) the mask is applied.
The Tips have an extra paramter, Tip Depth. This mixes in depth data to the Tip Mask to get a better sense of…well depth. This way the tip color doesn’t look like it’s “painted on” by a straight line. It’s controlled by a Position parameter via a Histogram Scan. Move the Tip Depth up to get more of the Tips exposed. Decrease the value to get only the top hairs exposed.
The Scatter Mask is commonly used by hair shaders such as Unreal Engine, which has an input for it in its hair shader. It is generally in the center of the hair strand but more towards the roots. Use the Scatter Y Offset to move it up and down the hair strand. It’s clamped to start at the midsection going upwards towards the root along with the Scatter Mask Coverage Size since it only covers the root half of the hair at most.
If you’re not aware, when specular highlights hit hair, the hair bounces the light inside the hair, then reflects or SCATTERS the light back out towards the root of the hair. The Scatter Mask determines where that bouncing internal reflection comes from and is a type of secondary gloss map, in a sense.
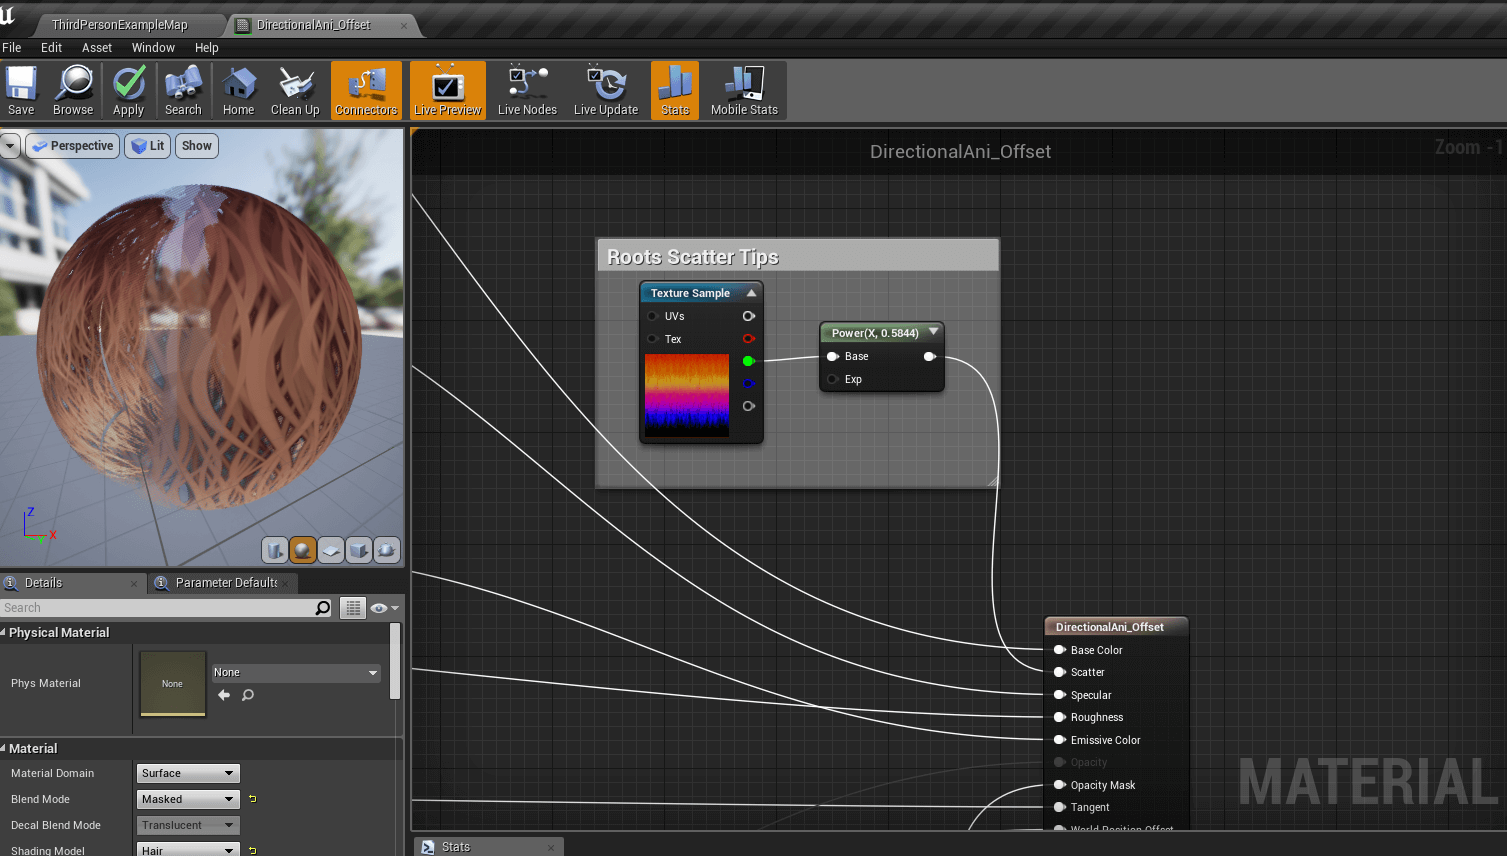
Roots, Scatter, and Tips output from the Hairdini Substance material. Plug the scatter map from the green channel into the scatter input of the Unreal Engine hair shader.
The Roots, Scatter, and Tips map is combined into an RGB channel, PACKED. That means the red channel contains the roots, the green channel contains the scatter, and the blue channel contains the tips. This is similar color coding to the Hairdini HDA‘s Color Attributes system.
That concludes the parameter section. Keep in mind there is also a COMB MAP included with the Hairdini Substance Material. You’ll use this to help guide the location of the specular highlights in a hair shader, such as Unreal Engine. It helps orient the specular highlights to be at a cross tangent for each hair, and not look like a highlight on a flat polygonal card. You can mix the comb map output from the substance graph with the comb map data stored in uv4 and uv5 from the Hairdini HDA asset, if you wish, for more control.
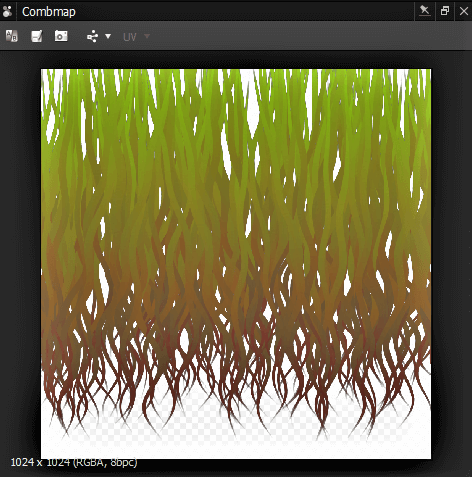
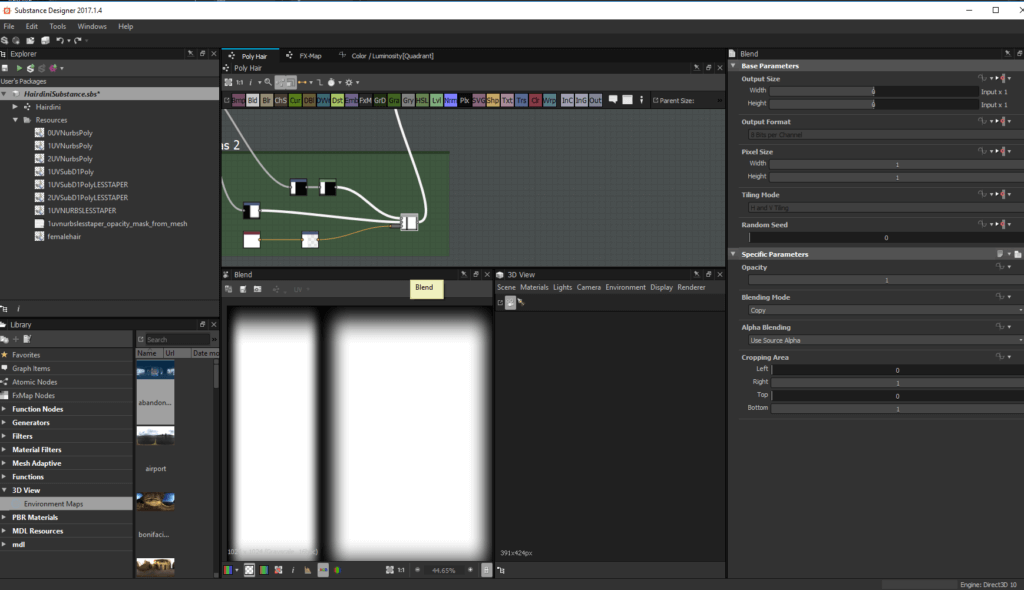
Comb Map from Substance Designer for Hairdini. Combine this with the Houdini Comb data for full detail.
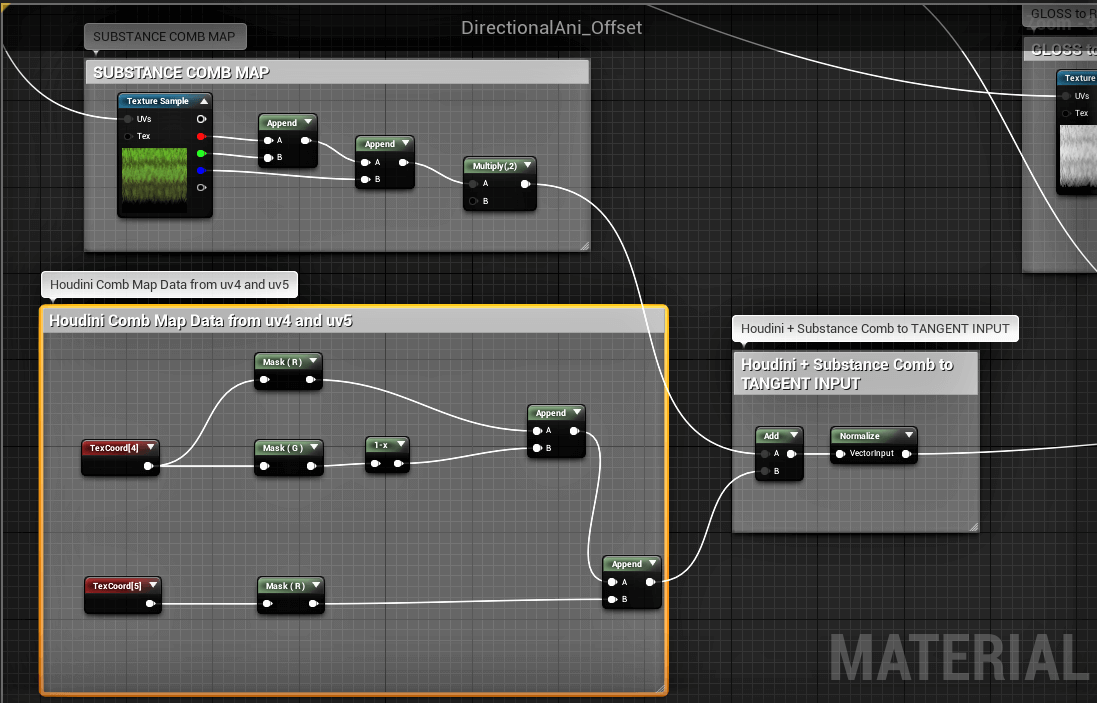
Example Blue Print in Unreal Engine getting the Comb Map data from Houdini on the bottom and from the Hairdini Substance, on the top. Add the two together, then normalize to mix them together.
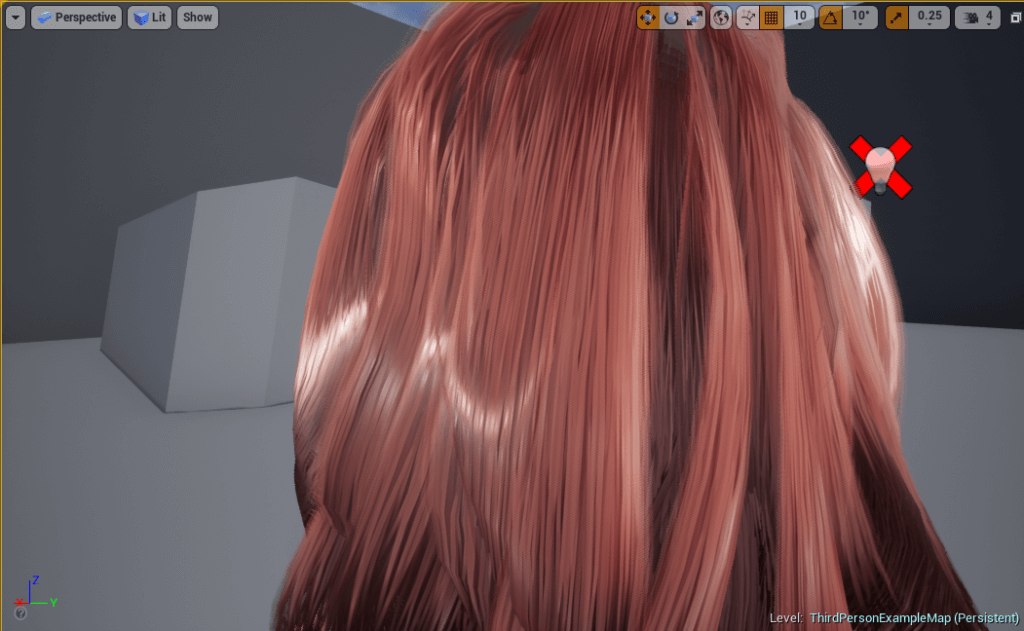
The Comb Map from Houdini is on to align specular highlights to the geometry properly. Notice it looks like a straight line over a flat card with opacity cutout. Looks good, but not quite there yet.
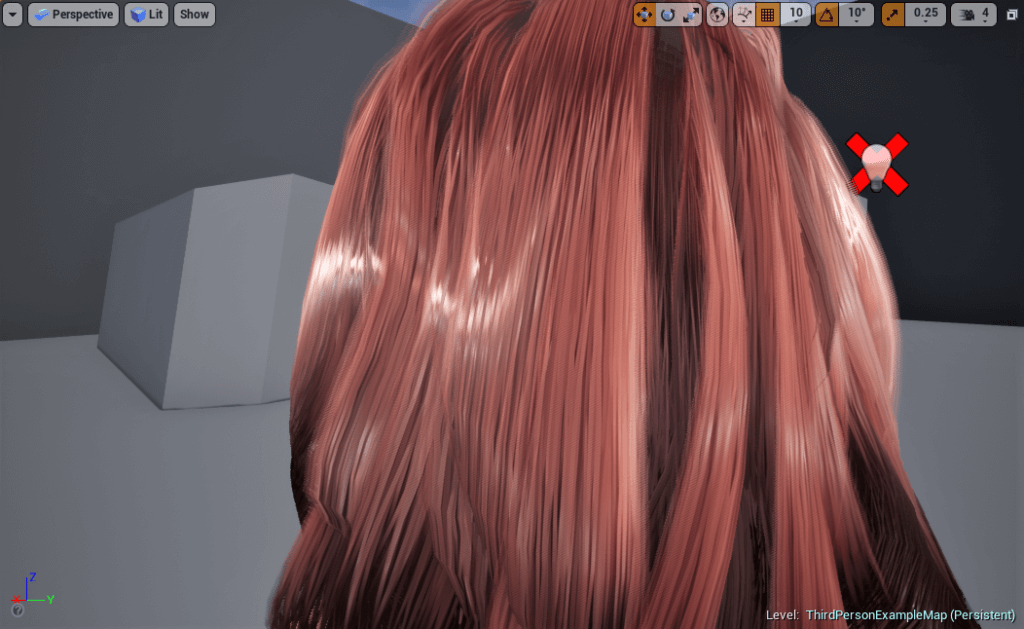
Now we turn on the Substance Comb Map and mix it with Houdini’s Comb Map. Notice the specular highlights are now ALIGNING with INDIVIDUAL STRANDS of hair and are offset a bit, not in a straight line. This helps add depth to the hair.
PLEASE BE SURE TO CHECK OUT THE REST OF THE DOCUMENTATION:
The Hairdini Houdini HDA Documentation
The Hairdini Unreal Engine Shader Setup Guide